This post may contain affiliate links. Please read my privacy policy.
Here is the Nyonya kuih pie tee step-by-step cooking guide:
Making Nyonya Kuih Pie Tee is a two-step process:
First, the making of the cases/shells.
Secondly, the preparation of the filling and toppings.
FREE EMAIL BONUS:
5 Secrets to 20 Minute Dinners!
Tips, tricks, and recipes for dinner in a hurry!
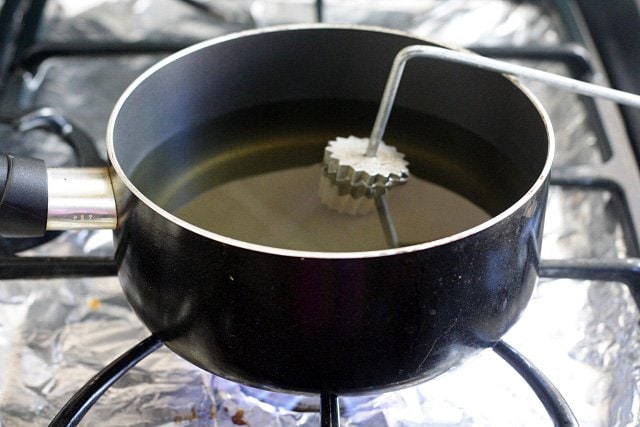
Heat up your Pie Tee mold in a pot of oil. Make sure the oil covers the top of the mold. The Pie Tee mold should be just hot enough…
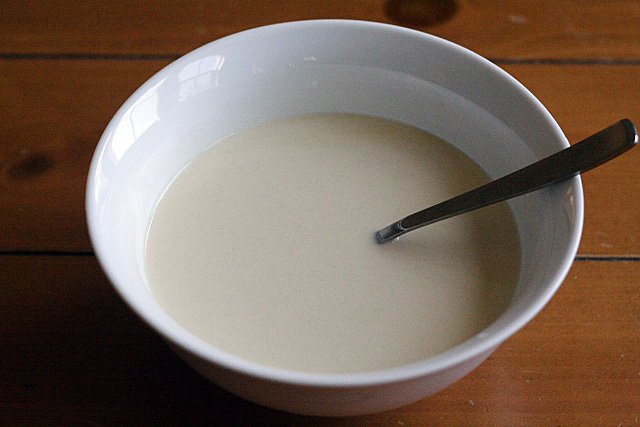
Pie Tee batter. Start by using a bigger bowl, as the batter recedes, transfer it to a smaller bowl, and then an even smaller bowl…

Dipping the hot Pie Tee mold into the batter, up to 90 – 95% of the mold. You can coat 1 time, or 2, 3 times if you want thicker cases. Make sure you check the bottom so it’s well coated. As your batter recedes, transfer it to a smaller bowl to get up to that 90-95% level…
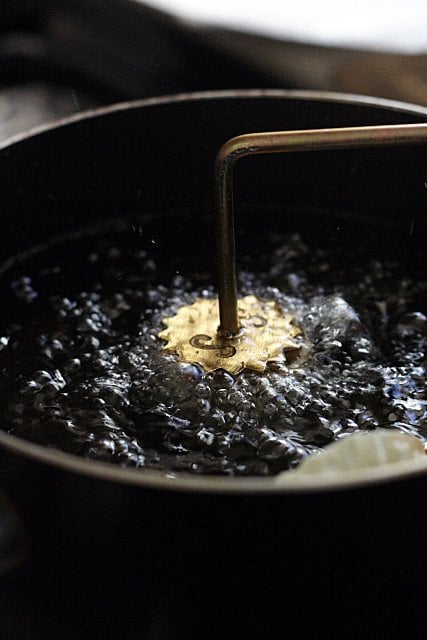
Shake the extra batter off the mold and transfer it to the oil for deep-frying…
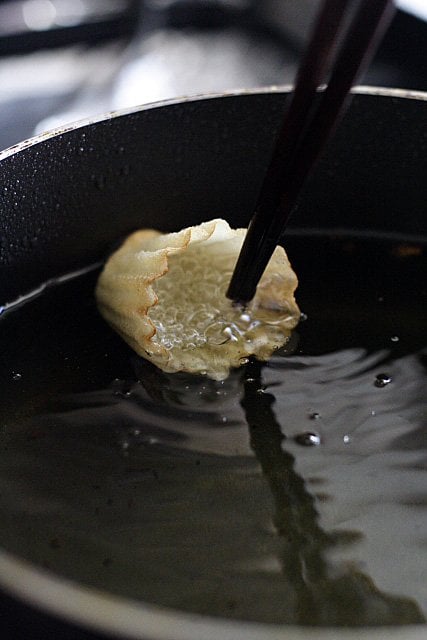
Use a pair of chopsticks to help fry the Pie Tee cases. If the case doesn’t come off the mold, use the chopsticks to loosen the top edges so the case comes off easily…
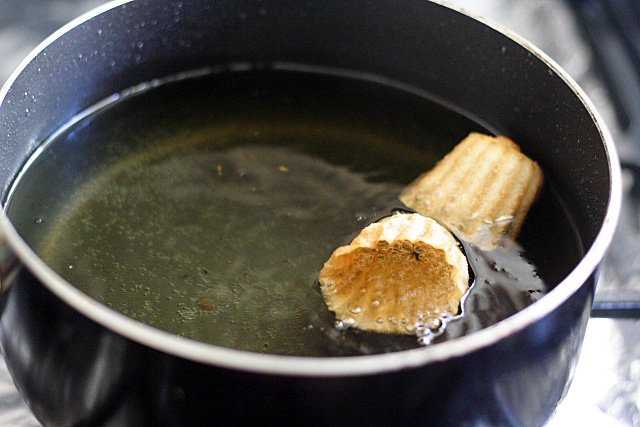
Beautiful, perfectly-shaped, and light to golden brown cases. The case shouldn’t come off the mold too early, or else it will not retain the perfect shape…
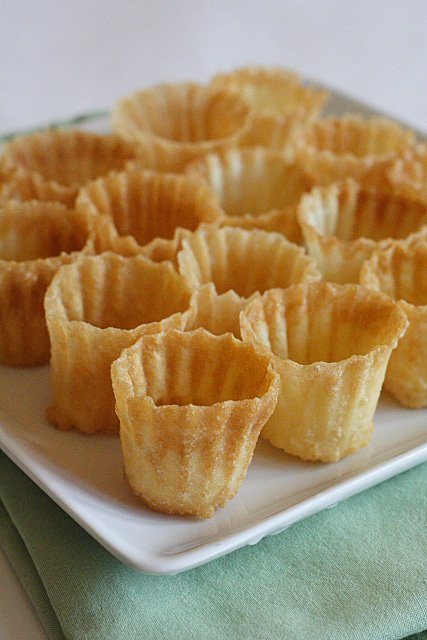
Pie Tee cases ready for the fillings. Store the cases in an airtight container to keep them crispy…
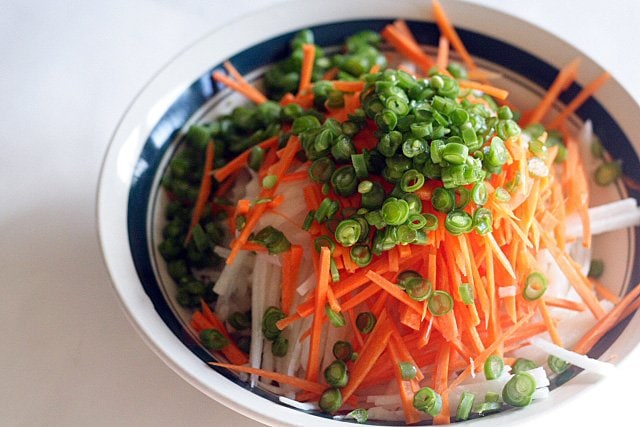
Chopped jicama (yam bean), french beans, and carrots…
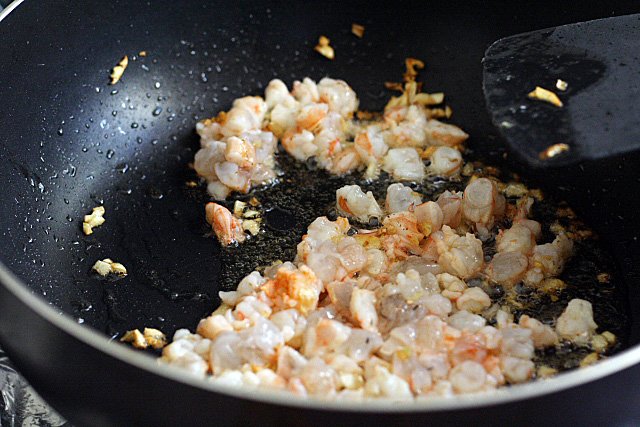
Stir-fry chopped shrimp with minced garlic until aromatic…
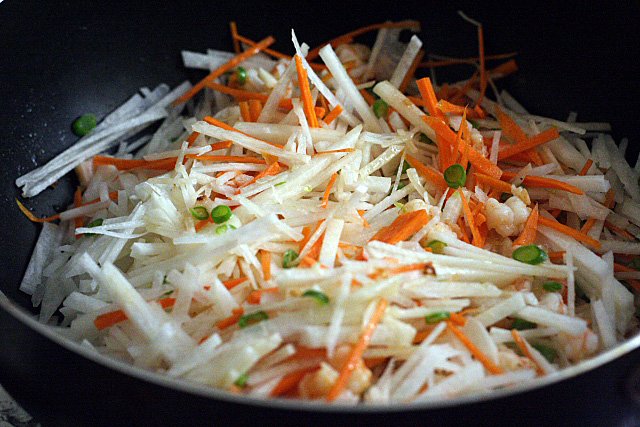
Add in all the vegetables, seasonings, and some water…
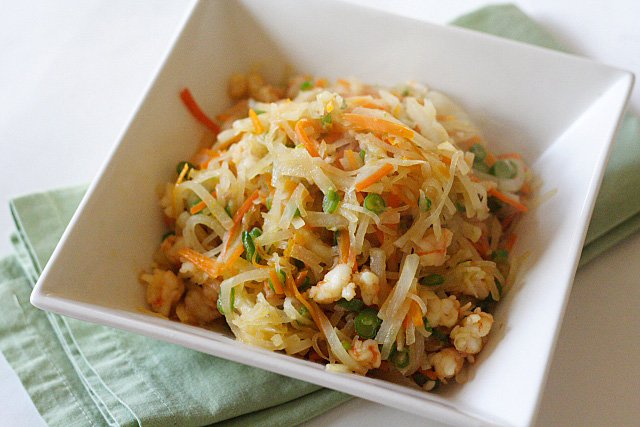
chopped scallions, red chilies, and fried crispy shallots.
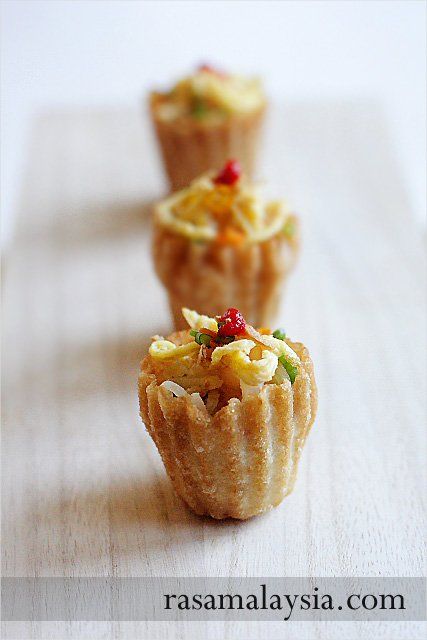
I wanted to warn you that the cooking process is long (read: it will take up to 3 hours to make them); it also takes lots of patience, especially if you are a first-timer. But, when you pop one of these “top hats” or Nyonya kuih pie tee in your mouth, all your efforts will be wholly justified, I assure you.
How Many Calories per Serving?
This recipe is only 18 calories per serving.
What to Serve with This Recipe?
Serve this dish with other Malaysian dishes. For a Malaysia meal and easy weeknight dinner, I recommend the following recipes.
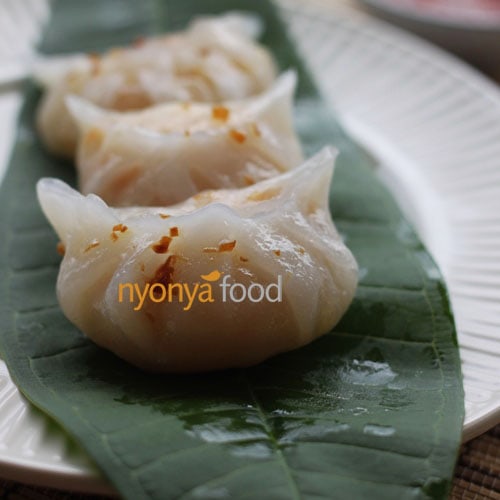
Nyonya Kuih Pie Tee
Ingredients
Shell Batter
- 1 cup all-purpose flour
- 1/4 cup rice flour
- 1 egg (beaten)
- 1 1/4 cups water
- oil for deep-frying
Fillings
- 2 tablespoons oil
- 2 lbs (1kg) jicama/yam bean, shredded
- 1 carrot (shredded)
- 10 French beans (chopped)
- 4 oz (125g) shrimp (shelled, deveined, and cut into smaller pieces)
- 4 garlic (finely chopped)
- 1/2 teaspoon salt
- 1/2 teaspoon sugar
- 1/2 teaspoon chicken bouillon powder
- 2/3 cup water
Toppings:
- 1 plain omelet (shredded)
- fried shallot crisps
- scallions (chopped)
- 2 red chilies (chopped)
- garlic chili sauce or sriracha (optional)
Instructions
- Combine the all purpose flour, rice flour, beaten egg, salt, and water in a mixing bowl and mix well. Strain the batter, transfer it into a big bowl and set aside.
- Fill a sauce pan that is deep enough for the mold with oil enough to cover the mold.
- Heat up the oil until hot. Then dip the mold into the heated oil until it's just hot (but not too hot).
- Take out the mold and then dip it into the batter. Coat the mold until it's up to the 90-95% level and make sure it's well coated on the side and the bottom (the mold shouldn't be too hot, and it shouldn't sizzle when it's dipped in the batter). Let excess batter drip off, then plunge the mold into the hot oil.
- To separate the batter from the mold, jiggle the mold up and down to loosen it. The case should off with slight shaking up and down. Once it's off, deep fry in the oil until it turns light to golden brown. Transfer it out onto a plate with paper towels (to soak up the excess oil) and store in an airtight container. (I use medium heat while making my cases.)
- For the filling, stir fry the minced garlic and prawns until fragrant. Add jicama, carrot and french beans, and do a quick stir.
- Add the seasonings and water. Cook until the vegetables are soft, about 5 minutes using medium heat. Dish out and set aside.
- To serve, use chopsticks to fill the case with the filling, and then top with shredded omelet, chopped scallions, red chilies, shallots crisps, and garlic chili sauce.
Notes
Nutrition
Hi, I love Kuih Pie Tee! It’s fiddly making the cups but it’s worth it, & easy once you get started. I prefer a whole king prawn on top of the vegetable mixture, the texture & juiciness makes it amazing! ?
you can buy the moulds online, but they’re usually crazy expensive outside malaysia.
Hey, I just wanted to say how I love your combination of ingredients used.
Hi,
May I please check with you how much water goes into the batter for the pie tee shell? Thanks so much in advance.
1 1/4 cups.
where can l buy the mould in the uk?
I don’t know.
If you can not get the mold (Check on line, occasionally you they have it for sale), I have found that during the Christmas holiday that many of the stores in North America and Europe has Rosette/Timbale Set. The square and circle can be used as an alternative mold (but a little big) and can be finicky to get right. So I finally got one from and it made a lot of difference.
you can get it from ebay https://www.ebay.com/itm/262667139581?
Hi, I love Kuih Pie Tee! It’s fiddly making the cups but it’s worth it, & easy once you get started. I prefer a whole king prawn on top of the vegetable mixture, the texture & juiciness makes it amazing! ?
Can you find out where to buy the kuih pie tee maker. Thank you
Rather than making the cases (which I tried a very long time ago) is there a replacement that can be bought in an asian store or what would you suggest rather than those delicate cases that I could use? Because I remember how amazing these taste, but I simply don’t want to try the cases again! Thank you!
You can’t buy the cases and there is really no replacement.
Where can we buy medium size aluminium alloy kuih pie-tee moulds? In Malaysia, the manufacturer has stopped manufacturing this type of moulds. However, brass moulds are available but too heavy to handle. Another company has produced alloy moulds but the bottom part is too wide, and hence the pie-tee cups cannot be stacked in sixes or sevens for packing in tins. Can anyone out there is able to help??
Can I make the crust a day ahead & store it? I’m living in US, the weather here is pretty dry.
Where can I find the mold in US?
Not available in the US.
It’s on occasion available on Amazon – https://www.amazon.ca/gp/aw/d/B08VZGJGR2/ref=sspa_mw_detail_0?ie=UTF8&psc=1&pd_rd_i=B08VZGJGR2p13NParams
Instead of using this recipe, i use fresh wonton pastry and mould around the handle of a whisk and deep fry till golden brown and use kitchen paper and wrap around the cooked pastry, gently pull the pastry out.Its quite time consuming, but it stay crispy overnight, must be completely cool before you put away. (preheat your cooking oil to 180 degrees and reduce to 170 degrees ) before you deep fry.I had a finger food party and went very well. Enjoy cooking.
Great suggestion Lizzie.